 Azure
Azure Policy
 Microsoft Defender for Cloud
With Microsoft Defender for Cloud, previously known as Security Center, you can easily monitor your Azure subscriptions on a large scale. For continuous improvement, or even regulatory purposes, it is possible to directly affect initiatives as I mentioned in a previous post https://woivre.com/blog/2021/12/microsoft-defender-for-cloud-your-toolbox-for-azure-governance However, you can go further via the “Regulatory compliance” tab in Microsoft Defender for Cloud.
But it is also possible to integrate your own controls with your own policies to fully customize your experience with this tool.
n order to begin, we will start by creating a new Azure Policy, such as this one:
{
  "mode": "All",
  "policyRule": {
    "if": {
      "allOf": [
        {
          "field": "type",
          "equals": "Microsoft.Storage/storageAccounts"
        },
        {
          "field": "Microsoft.Storage/storageAccounts/supportsHttpsTrafficOnly",
          "equals": false
        }
      ]
    },
    "then": {
      "effect": "deny"
    }
  },
  "parameters": {}
}
We will of course think of giving it a name and a comment, but you have the choice for all the parameters, such as the following:
- Policy Definition : Tenant Root Group
- Name : AzSecure-Storage-OnlyHTTPS
- Description : Enforce HTTPS Traffic only for Azure Storage
- Category : AzSecure-Storage
Now we will not assign this policy directly, but we will create a new Initiative Definition with the following parameters:
- Initiative Definition : Tenant Root Group
- Name : AzSecure-Compliance
- Description : Contains all Azure policies to secure your Azure account
- Category : AzSecure
- Version : 1.0
Then in the list of policies, we will now integrate the policy that we created earlier. You can also create groups to organize your different policies later.
We will then define our parameters for our Initiative, and our policies if we have any. This is not the case here.
Once we have created our policy, we will then assign it to our subscription. And here, it can be very useful to edit your different Non-Compliance messages for your policies to guide your users.
Now that your initiative is assigned to your subscription, you will be able to observe the behavior of the policies in a very classical way, i.e. to create non-compliant services, and to see the different elements in the different Policies blades available.
But it is also possible to go further thanks to Microsoft Defender for Cloud, in the Microsoft Defender settings section.
You have to go to Security Policy and then add your own initiative as below:

Now you have to be patient, and wait several hours to be able to your Regulatory compliance blade enriched by your own initiative as below:
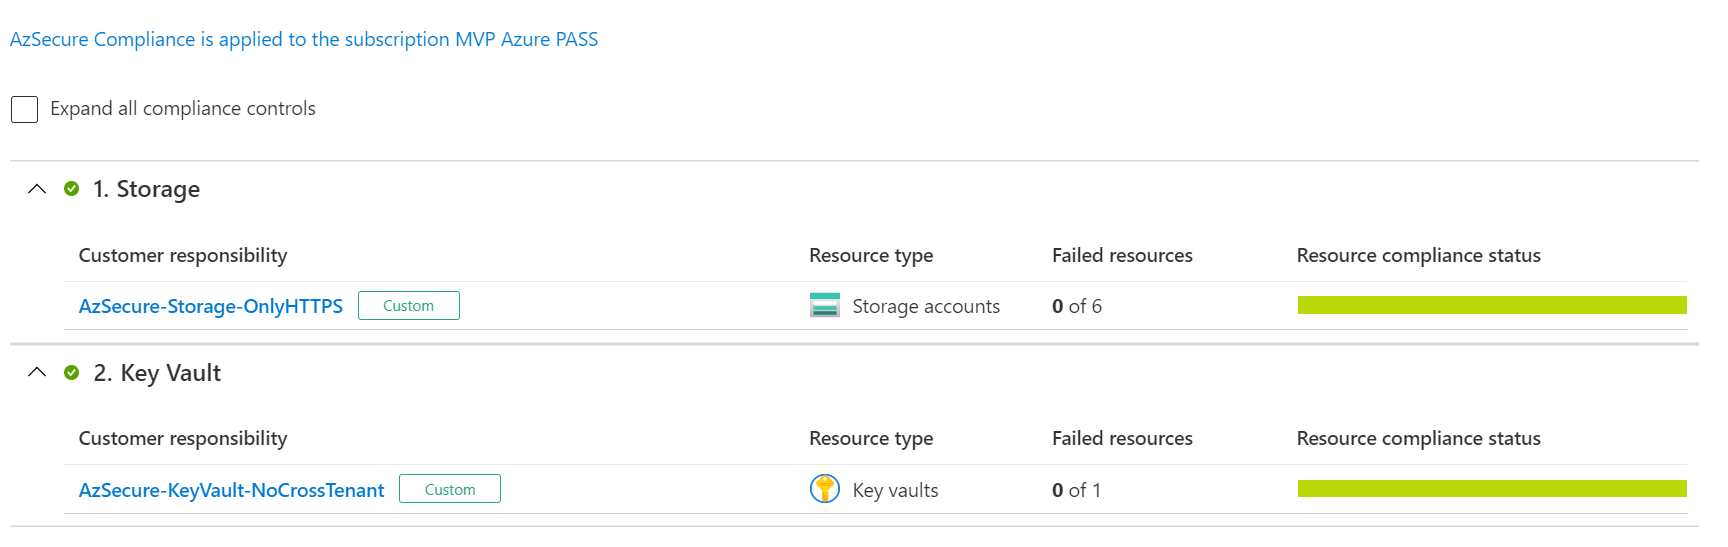
Now for the bad news, you have to activate this feature in Microsoft Defender for cloud to be able to use it, and therefore pay for this feature. But security is priceless.
Comments
Post comment